You’re probably here because you read somewhere that you need to set up Google Analytics on your brand-new website. Don’t break a sweat—setting it up is a breeze! In our guide, we’re ditching the jargon to make this process super chill. Whether you’re a tech pro who needs a refresher or just dipping your toes into the digital pond, we’ve got your back. Let’s unravel the mysteries of web analytics together and effortlessly boost your website’s game. Get ready to crush it with Google Analytics.

Step 1: Sign in to Google Analytics with your Gmail Account
If you haven’t already, take the first step by going to the Google Analytics platform by clicking here. If you don’t have a Google Analytics account yet, you may log in using an existing Gmail Account.
Step 2: Follow the Setup Prompt to Complete your Profile Information (Skip if you have already done this before)

When you first sign up Google will send you to a landing page where you can complete the setup of your account. Just follow the prompts on the page to get started.
Step 3: Create an Account
First, it will ask you to create an account. Your Google Analytics data will be arranged into accounts and properties. Accounts act as a container for your properties. Properties, on the other hand, represent the website or app that you are collecting data from. An account can have multiple properties inside it. Here’s the resource page from the official Google knowledge base.
In this example, I will call my new account Chris’s List of Million Dollar Websites:
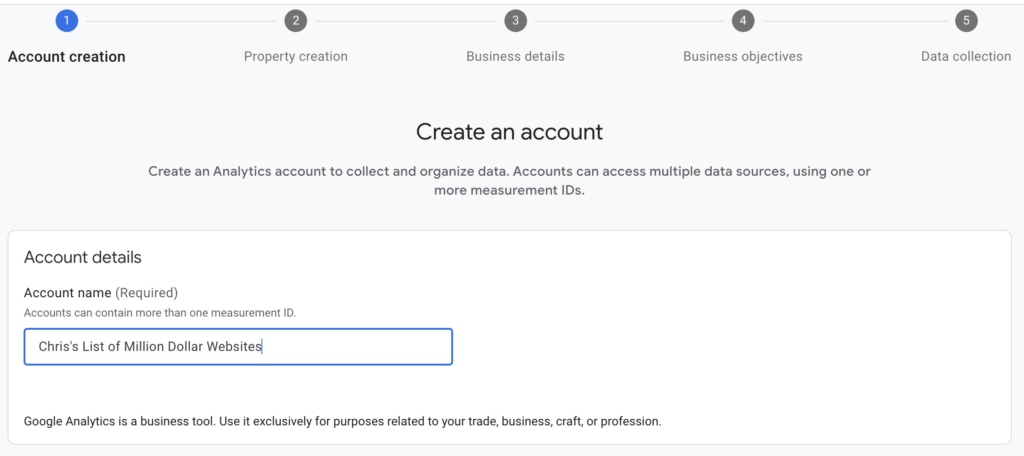
Read the Data Sharing check boxes below and check the necessary ones. After that, click NEXT.
Step 4: Create a GA4 Property
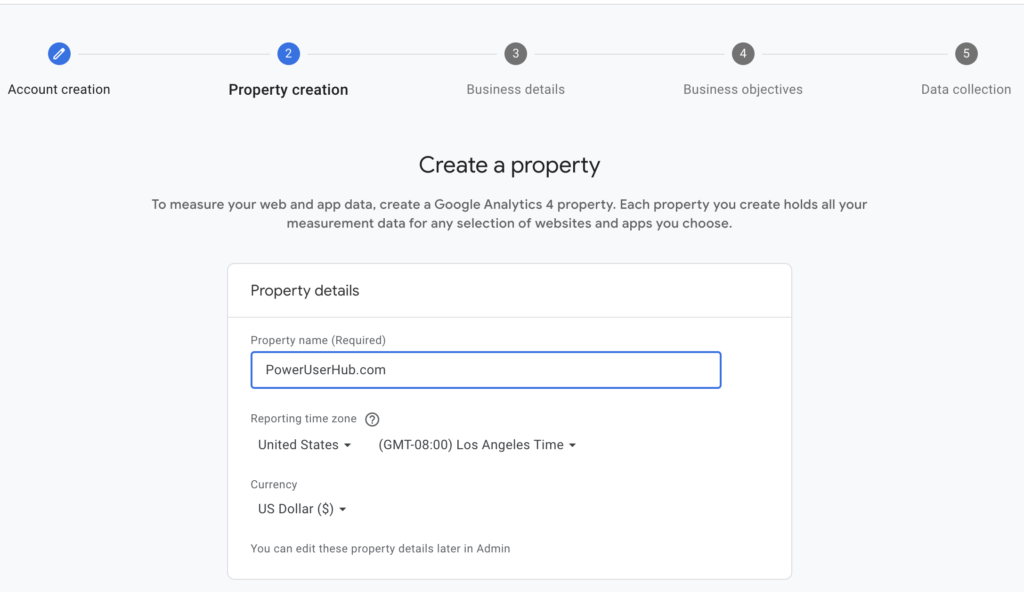
Next, you will be asked to create a property inside the GA Account you just created. They will ask you to name this property. At this stage, I like to give my property identifiable names that would make it easier for me to identify which website or app it is for.
You will also be asked for the time zone and the currency you want to use for data collection and reports. For the timezone, I would suggest using the timezone that works for your business. For instance, I have a website with most of its users coming from Spain. While I am located across the pond, I prefer to use the Spain timezone because I like to get behavioral insights from the people who use my website based on the time of day in their locality.
For the currency, I would suggest using a consistent currency throughout the platforms that you plan to connect to this account. Your GA Accounts will be able to connect to your Google Ads and Google AdSense accounts. Because all other accounts report using USD, I also use USD for my Google Analytics account.
Step 5: Complete the Business Objectives & Company Size Questions
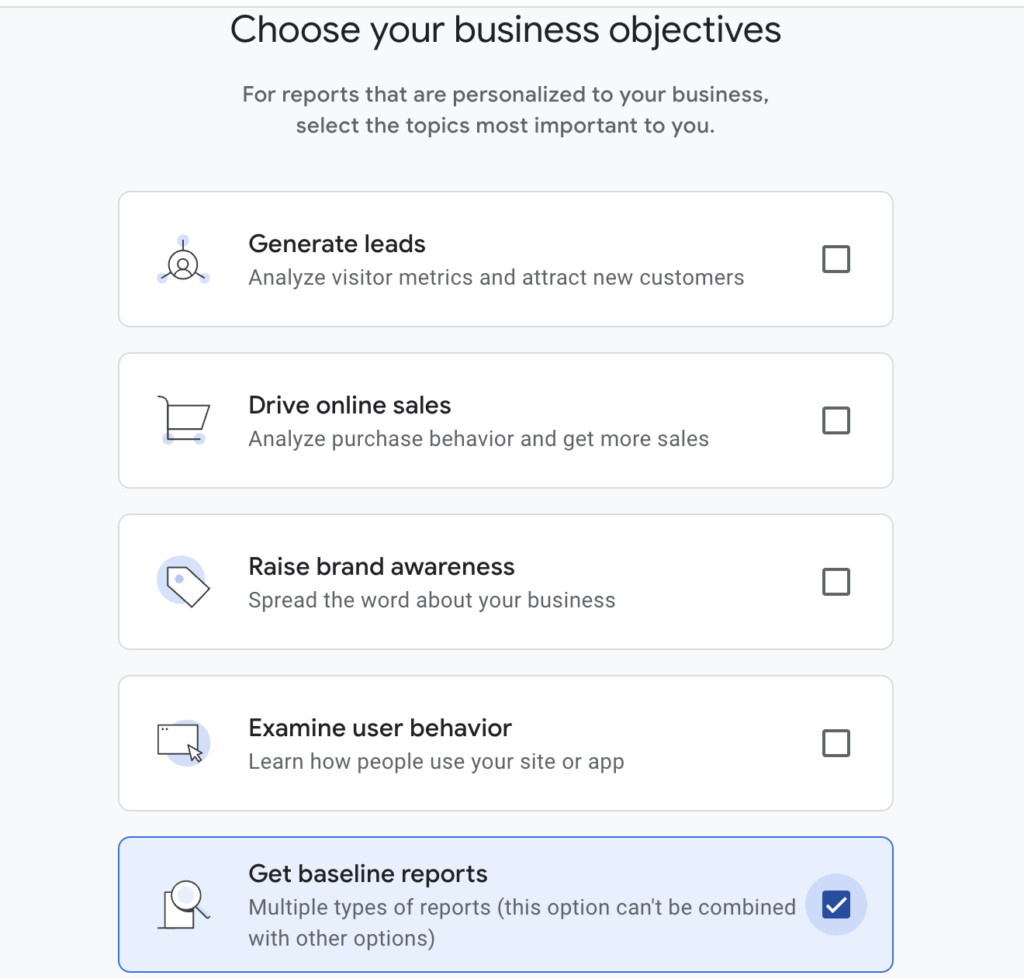
The next two steps are straightforward. Google will ask you about the industry category of your website or app and the size of your company. Next, it will ask you for your objectives for creating an account. Choose the appropriate objective for your website or app to move on to the next step.
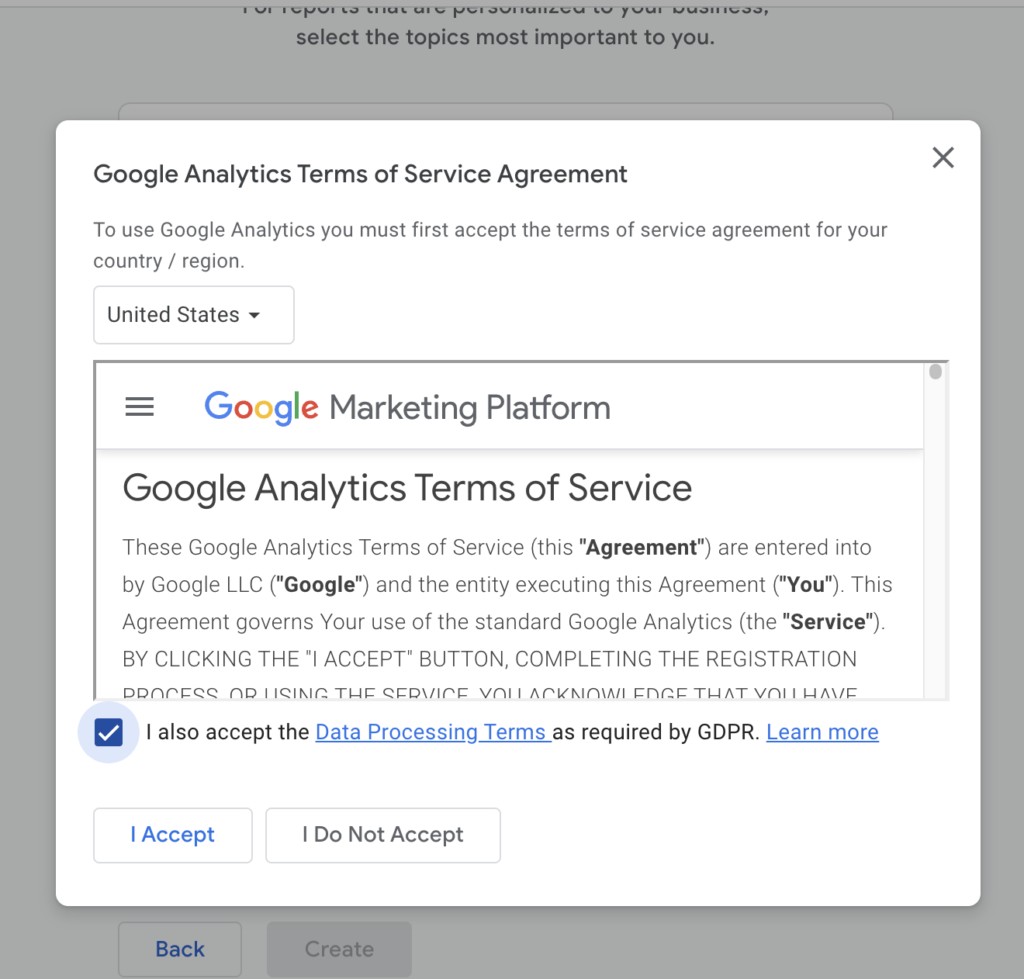
Step 6: Accept Google’s Term of Service to Proceed
Step 7: Add the GA Code to your Website or App
That’s it for setting up your account. The next step is to add the Google Analytics snippet to your website to start collecting data.
This is where most beginners get stuck because the prompt does not automatically redirect them to their GA dashboard. To find your GA code snippet, you first need to go to the dashboard. To get there, find the 4-boxes icon on the upper right of your home screen. If you click it, you should see Google Analytics among the options. Clicking this should send you to the dashboard:

The dashboard should look like this as of 2024:

If you haven’t added any code snippets to your properties yet, you should get that red notification at the top of the page. Go to the home tab to find the option for adding the code snippet:

Click the button for the appropriate type of property that you will be collecting data from. In my case, I will choose the Web option because I will be collecting data from a website.
It will then ask you to give the website URL and a name to your web data stream. Just name it according to your website for a general GA setup.

In some cases, you may want to create a name with more details. One instance would be if you were setting up a data stream for a specific promotion and you wanted to separate that from your general website data.
Wix and Shopify:
At this point, you will have two options on how to add the Google Analytics code snippet to your site. If you are using Wix, Shopify, or other website builders, they usually have a feature that will allow you to insert the GA code just by giving them your Tag ID. The Tag ID is an alpha-numeric code that allows Google to identify which website data goes to which GA accounts.
WordPress CMS
If your website is built using the WordPress CMS, the simplest way to add the code is by using free plugins. Some of the top recommended plugins are:
With these WordPress plugins, you will only need to add the Google Analytics tag ID to your website.
Adding the Code Snippet Manually
Google Analytics also gives you the option to add the snippet manually. To do this, you will need to have access to your website’s HTML code.

For WordPress, you can do this by editing your theme’s header.php file. The danger of doing this is you might lose data collection when you change or do updates on your theme. To access this, follow this path:
Website WordPress Dashboard > Appearance tab (sidebar) > Theme File Editor > header.php (Under theme files)
You should insert the code snippet a line after you see the <body>. After pasting the snippet, save the file to complete the installation.
Step 8: Test your GA4 Installation
Now that you have connected your GA account to your website through the code snippet, the next step is to make sure that you are collecting data as expected.
How to Test Your Google Analytics Installation?
In your Google Analytics dashboard, you should see a card labeled “User in the Last 30 Minutes”. This card is your real-time report. If a user goes to your website, it should instantly show up here. The best way to check if your GA installation is working is by loading your website. A few seconds after you access your website, you should see 1 visit in your real-time report.
If a few minutes have gone by without a ping in the report, you should review the steps above to check your GA installation.

Bonus Step: Step 9- Avoid Recording Your Own Visits
As the website admin, you will be visiting the website a lot. In the beginning, when your website is not getting enough traffic, your visits may make your website data confusing to read. To prevent this from happening, you can use this Google Chrome plugin: Block Yourself from Analytics by igorware.com.
With this Chrome plugin, you should be able to easily block your visits from adding to your user count. All your activities on the website will be blocked from registering on your GA account when using Chrome, including events such as link clicks, bounce, etc.
